Setting Up the Integration - NetSuite
Prior to starting the integration, your Integration Manager will require your NetSuite settings to be set up for the connection.
We recommend providing your Integration Manager with admin access to your NetSuite account to ensure the setup process is as efficient and timely as possible.
If you choose to enable the settings yourself, please proceed with the steps outlined below.
Enable Features
- Go to Setup > Company > Enable Features
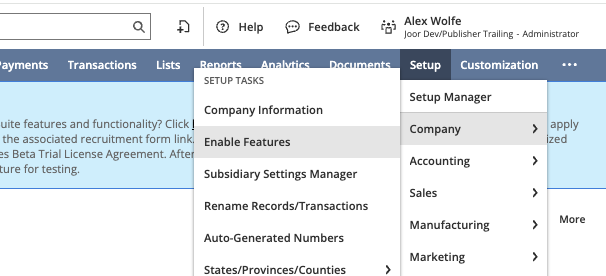
- Go to the SuiteCloud tab

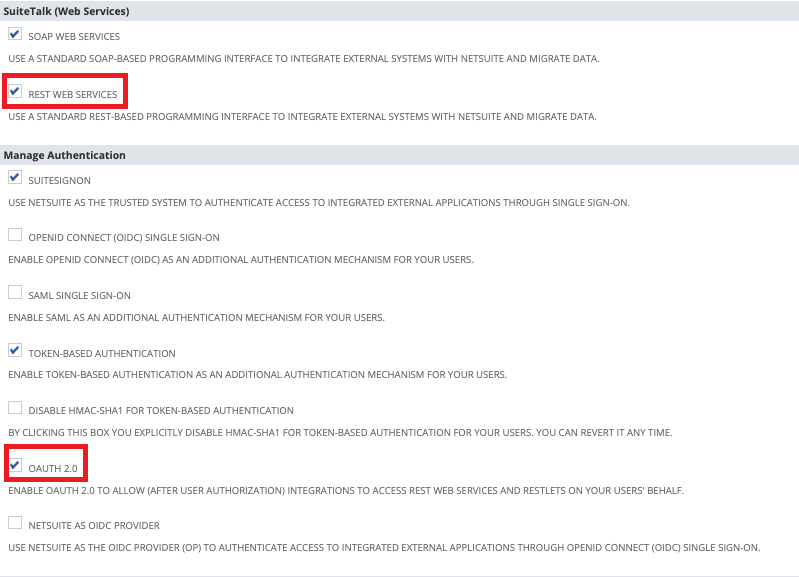
- Check the following options to enable them:
- REST WEB SERVICES
- OAUTH 2.0
Create an Integration Record
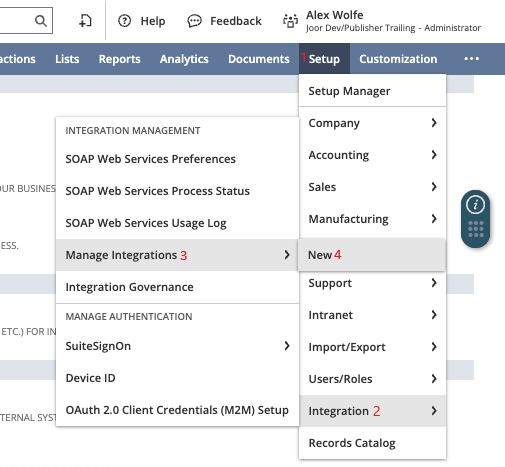
- Go to Setup > Integration > Manage Integrations > New
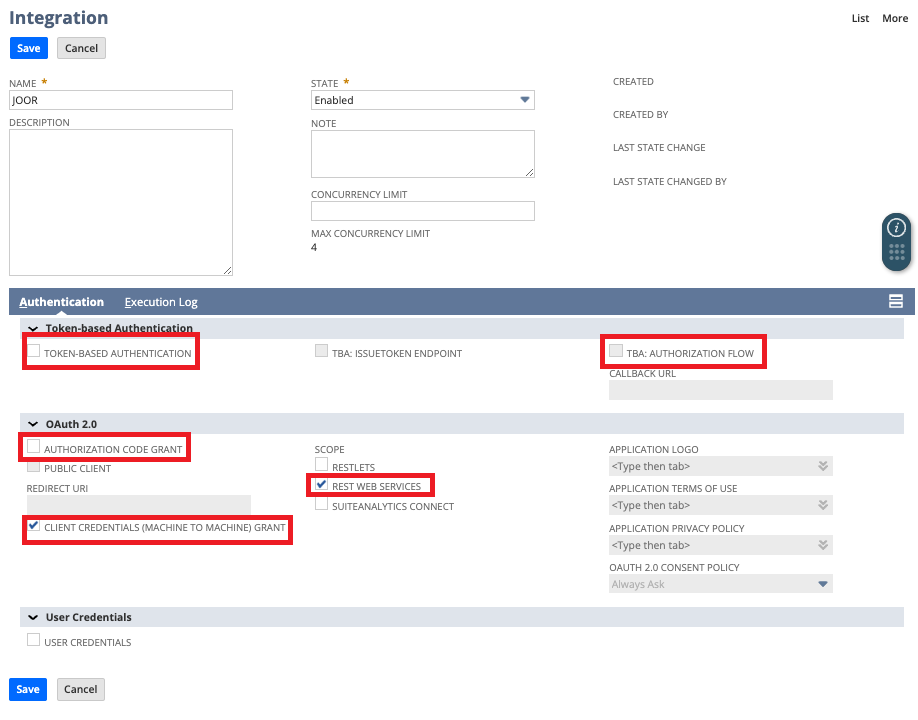
- Set a Name for the integration
- Uncheck the following options to disable them:
- TBA:AUTHORIZATION FLOW
- TOKEN-BASED AUTHENTICATION
- AUTHORIZATION CODE GRANT
- Check the following options to enable them:
- CLIENT CREDENTIALS (MACHINE TO MACHINE) GRANT
- REST WEB SERVICES
- Save
IMPORTANTMake note of the following credentials as they will need to be shared with your Integration Manager.
- CONSUMER KEY / CLIENT ID
- CONSUMER SECRET / CLIENT SECRET
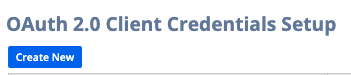
Create an OAuth 2.0 Access
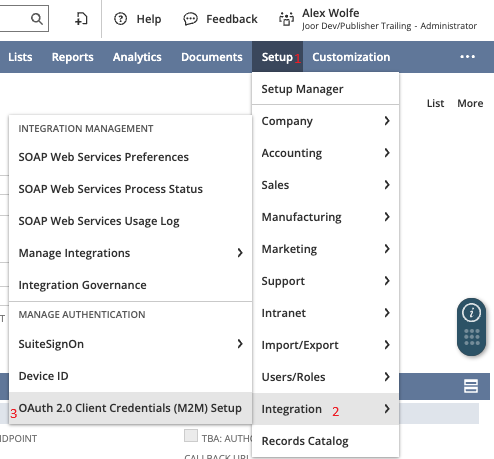
- Go to Setup > Integration > OAuth 2.0 Client Credentials (M2M) Setup
- Click Create New
- Set the user's name in Entity
- Select the Administrator role
- Select the Application created in the Create an Integration Record step
- Attach the *cert.pem file provided by your Integration Manager

IMPORTANTMake note of the Certificate ID created in this step as it will need to be shared with your Integration Manager.

Updated 11 months ago
Did this page help you?